Thursday, October 17, 2013

Custom jewelry armorie using two toned distressing in grey and white

This a custom order I received for a small jewelry armoire I had.  It was just plain dark wood color to start out. 

My client wanted it grey with white showing through the distressing. And a Fleur de lies on the sides and top. She then saw the French writing script stencil and really wanted that. So we put them together. I put the French script in white and then distressed before adding the fluer de lies and distressed a little more. 

For the handles I used these brownish color fluer de lies drawer pulls I got from eBay and painted them white...then took a darker grey to had a little vintage to them.
Everything was sealed in either a sealant spray or furniture wax.
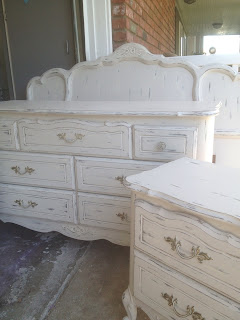
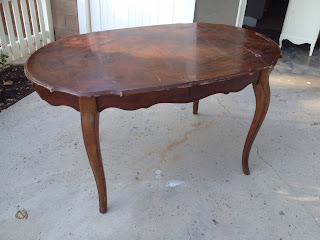

Before and After 

I like it I hope she does too :)   
Pin It!

Saturday, September 7, 2013

Custom orders using chalk paint

So I have two custom orders I am working on right now, one is a 12 drawer French dresser with two matching Nightstands.  I made the mistake of using chalk paint with this one, because she wanted it to be super glossy. And yes I know you can add sheen to chalk paint with the wax, but one I had not used it to buff that muck before and  two I used way too much hoping to get it glossy. A d now I am having this issue of where I tried to get the excess wax off I ended up taking some of the paint with it and it isn't distressed so this is an issue. 

No matter how many times I have painted it and waxed and sanded these small little corners are coming off and I just don't know what to do.....my plan is to petit sit for a few days paint it again....let it sit and then wax again and hopefully I will not have this issue again! Or I will scream. It looks do pretty in pictures though doesn't it. 


The next project shabby chic full set....


The other was also using chalk paint, but it was distressed so much easier. The chalk paint is so easy when it comes to distressing....yet messy.  I was using old white so with all the dust I looked like a ghost I was so covered. I should have taken a picture, but then of course I distressed too much. And had to paint and distress again..l.and wax again, bit this time with the help of my little one.  

 It ships out Mondays hole she loves it! 
Pin It!

Unfinished projects to be customized

So I have a bunch of new stuff to put into the shop and since I'm at the gym on the iPad I can't edit my website so I thought I ld just add them here until I get some time on the computer. 

I have two new entry/sofa tables 


A coffee table 
2 new sets of side/end tables 


2 new dressers


A new dining table 

2 new vanities and a desk

Pin It!

Monday, September 2, 2013

Before and after French Desk Red and Black

This was a simple French style antique desk, with beautiful curves and was in really great shape.  

Great buy too real cheap from the Restore...Habitat for Humanity store down the street.  I am in there everyday.  They pretty much know me now a days lol.  

So this was a custom order for the same client that got the night stands and the chest.  

She wanted them to match, but it was for her boyfriend and a surprise so we had to make it a bit more masculine.  So we went for red and black, clean and glossy with the same handles but in black and a big red old fashion crown in the middle....a stencil I made with my new stencil machine :)

We added a little decorative red lining in the creases down the sides of the legs for a little flare!


The crown really made it, but I wish I could have added some flare, but my husband said that it would have made it too girly....so there we go, vintage made a modern masculine masterpiece ;)

Pin It!

Thursday, August 22, 2013

Wood pallet signs

I know I haven't been posting much. I have been trying to get the website up and going and I got my iPad stolen...actually my dads iPad...from work the other day so posting on the phone is a pain. But I wanted to show everyone some of the little things I am working on. 
With the help of my custom stencil maker! OH YA! 


The first one I did of these I didn't stain the wood and it came out way cuter, although since I was still scared of the saw I just broke some pieces to attach to the back so that one is going to stay hung in our bathroom where it looks totally cute!
I have been making these little signs and plan on making some jewelry organizers/hangers from some picture frames with a piece of wood covered in fabric. I really should be making a ton of these since when I was in my sewing phase I collected quite the mass amount of fabric. And I need to get on the reappolsteting boat. I have one project, which is a vanity with a small little stool, which would be a great place to start, but I like it too much right now to do anything to it.  Plus my 4 1/2 year old going on 18 Wanted to get her hair cut! its too cute had to show you guys. And its the same hair cute mommy/me had when I was her age :)
Here's part of one of the custom orders I'm working on and a mirror I'm using some antiquing glaze over some chalk paint.

I'm doing all this little stuff because I'm doing an antiques fair in September and the last one I noticed that people aren't really there for the big ticket items. They like it short and sweet which is why I plan on busting out a bunch of jewelry hangers and a bunch of wood pallet signs. The signs are so fun too because I get to wack at the pallets to break them apart. :) 
Pin It!

Monday, August 12, 2013

Antique cherrywood stained and stenciled writing desk.

This desk was pretty much in perfect condition when we got it, but the top needed work....dosing e I was going to have to sand off the top anyway I decided to give some of my style. 


I used the French script stencil that I love so much and found out what it said too lol. 
"J'aime ton sens de l'humour" - I like your sense of humor
"Tu me fais rire" - you make me laugh
"Tu racontes des choses intéressantes" -you tell interesting things 
"Je t'adore Toujours dans mon Coeur" - I adore you, or you are always in my heart 
"J'aime ton sourire" - I love your smile. 

I added the stencil with black paint and then stained it back to the natural berry walnut stain it was and gave it three poly coats to make it smooth. 

The trick to getting it smooth with poly is to do very very light sanding in between coats with 220 grit or higher. 
And viola! 
Pin It!

Sunday, August 11, 2013

Custom order before & afters

Custom order bookshelves and desk. 

Before
And 
After


Before 
And
After


Distressed grey/black/white dresser set


Pin It!